Perforce: A Practical Guide to Streams
Perforce Stream Overview
What Is a Stream?
My personal understanding is that a Stream is a smarter version of a traditional branch, introduced by Perforce. It provides a visual view that makes it easier to see synchronization relationships between branches.
Pros and Cons
- Pros: concurrent development without interference; fewer mainline changes; a clear hierarchy.
- Cons: viewing history is relatively inconvenient; multiple workspaces are usually needed (you can switch among several Streams in one workspace by adjusting its root directory, but this is relatively cumbersome).
Note: preparing a local folder for each Stream can speed up workspace switching and save time.
Creating a Stream
Create a Stream Depot (P4Admin)
- Open P4Admin.
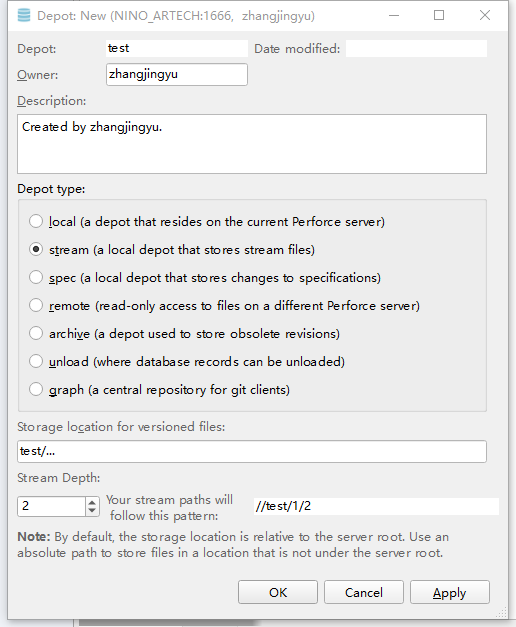
- File → New → Depot, and select
Streamas the type. - Set
Stream Depth(the depot’s hierarchy depth; 2 is recommended so the depot can contain multiple Streams).
Create the Mainline
- Open P4V.
- File → New → Stream.
- Set
Stream Name. - For
Type, selectmainline.
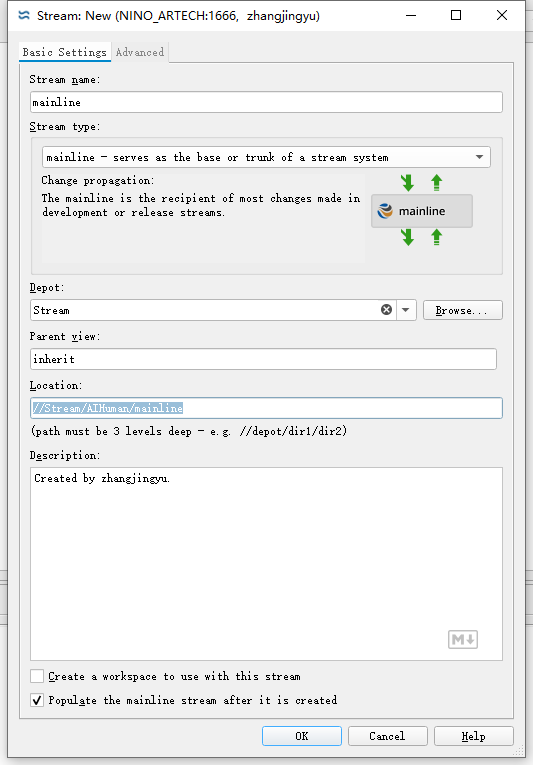
Note: pay attention to the save location (Depot/path).
Create a Branch
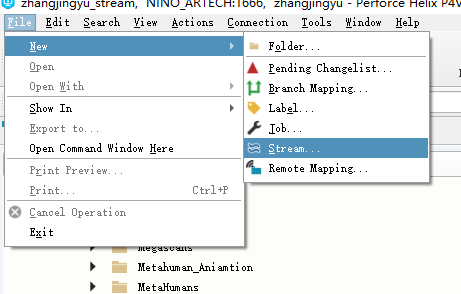
Method 1: File → New → Stream.
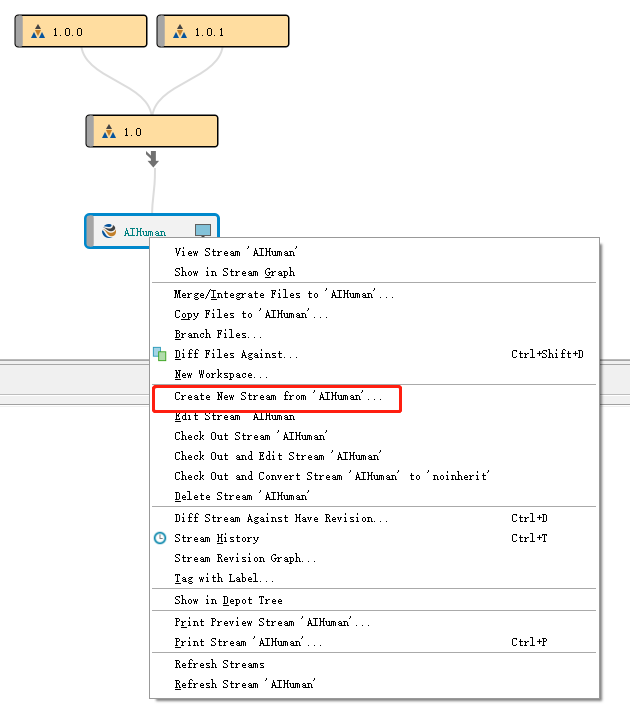
Method 2: in StreamGraph/the Stream list, right-click the parent node (such as the mainline) to create one.
Branch Types
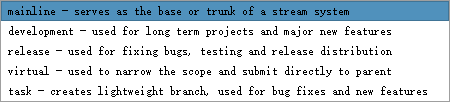
- Development: for long-term projects and major new feature development. Suitable for versions that evolve over a long period.
- Release: for bug fixes, testing, and release distribution.
- Note: when creating a Release branch, it is recommended to uncheck automatic propagation “From parent” to prevent mainline updates from automatically synchronizing to the release version; retain the ability to merge fixes from Release back to the mainline.
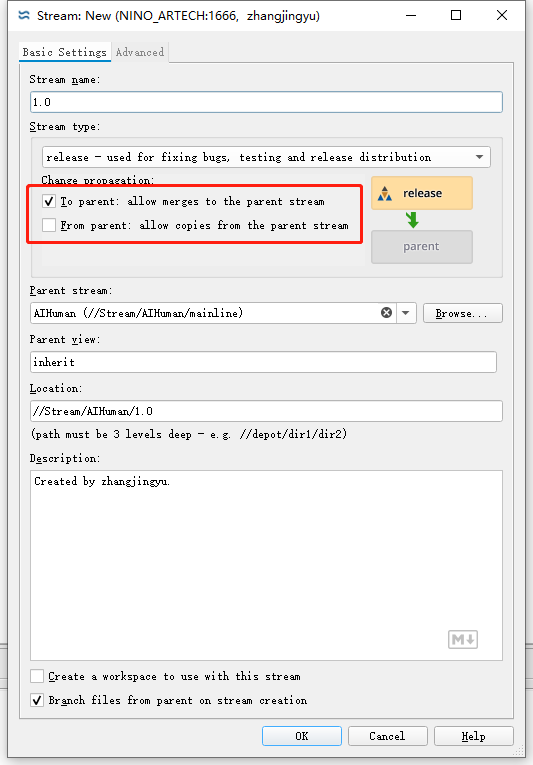
- Note: when creating a Release branch, it is recommended to uncheck automatic propagation “From parent” to prevent mainline updates from automatically synchronizing to the release version; retain the ability to merge fixes from Release back to the mainline.
- Virtual: narrows the scope and submits directly to the parent, often used as a filter for a specific subset.
- Task: a lightweight branch for short-term bug fixes/small feature development. It can reside in another Depot, and its parent can be empty or in another depot (including a standard depot).
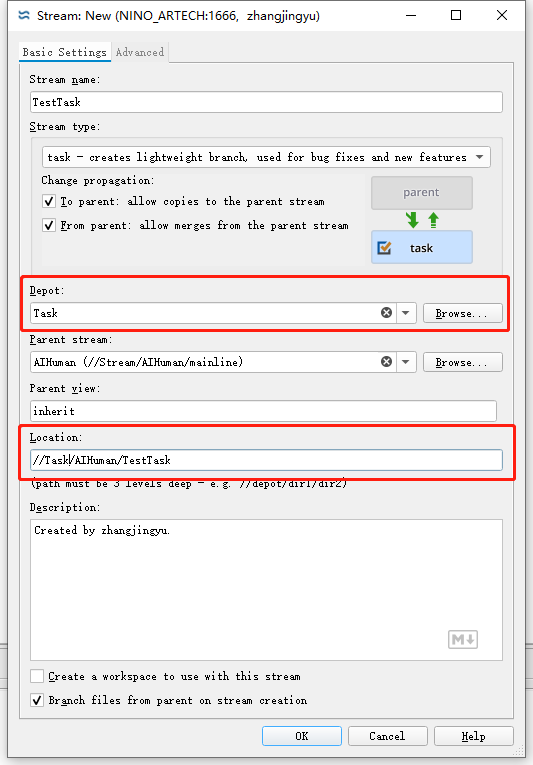
- It is recommended to put them all in the
TaskDepot for centralized management later; check whether Location points to the Task path, and adjust it manually if necessary. - Note: after creation, a Task cannot be deleted or share a name with another; it is invisible when not in use.
- It is recommended to put them all in the
Things to note when creating a branch:
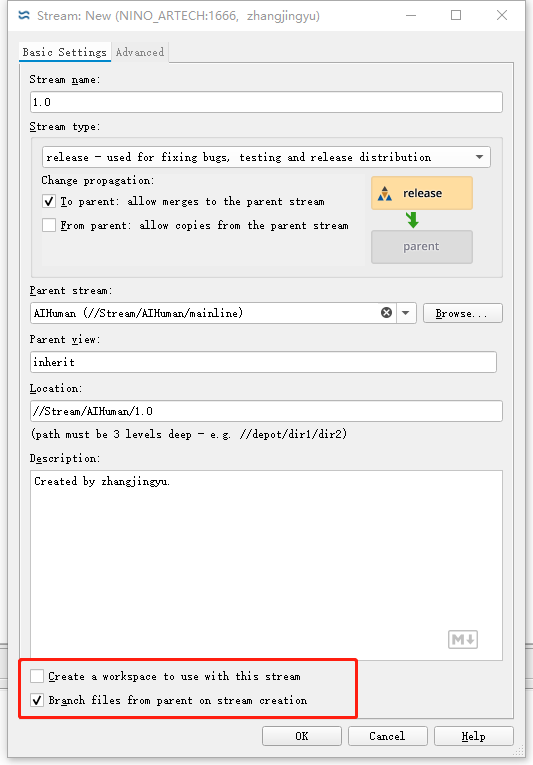
- “Create a workspace automatically” can be left unchecked (as needed).
- “Populate the branch with files from the parent” is checked by default (usually leave it checked).
Using Streams
Create a Stream Workspace
- Create a Workspace.
- Set the Workspace name.
- Set the Workspace root.
- Select the corresponding Stream.
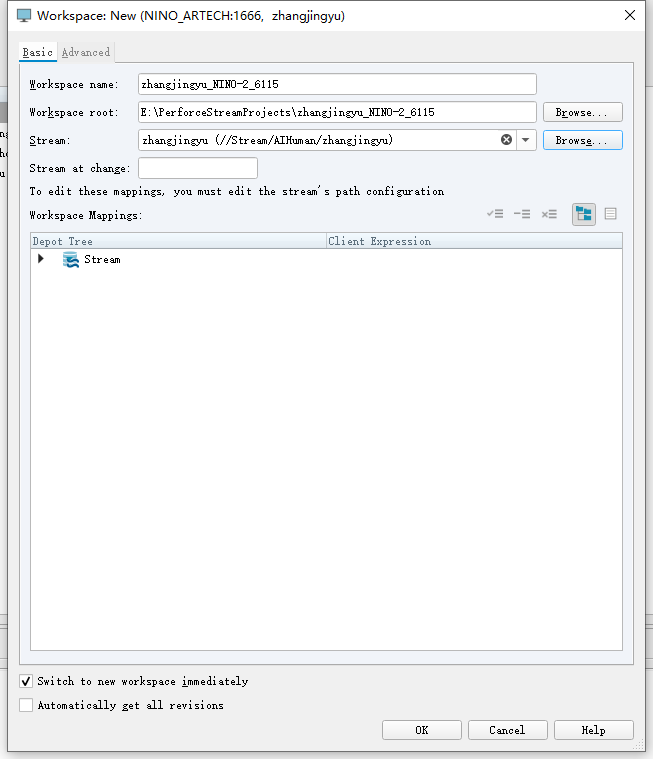
Switching Workspaces (StreamGraph)
- Open StreamGraph from View in P4V.
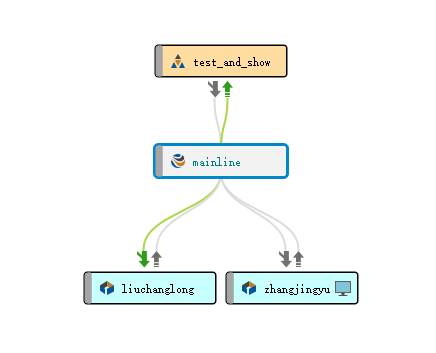
- Within the same Depot: drag the “computer” icon onto the target Stream for a quick switch; Perforce automatically downloads/cleans up differing files, while the workspace root stays the same.
- Between different Depots: the standard approach is to switch workspaces; if limited by the maximum number of workspaces (such as ≤10), you can switch by editing an existing workspace:
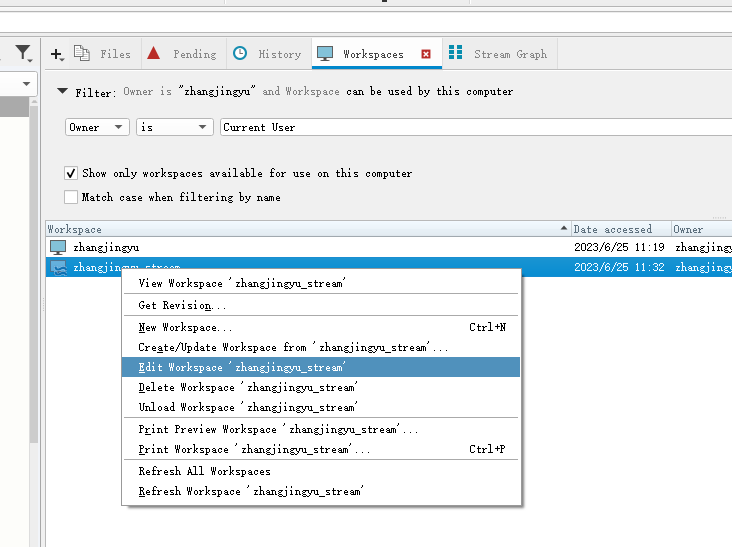
- Right-click the workspace in the Workspaces view → Edit.
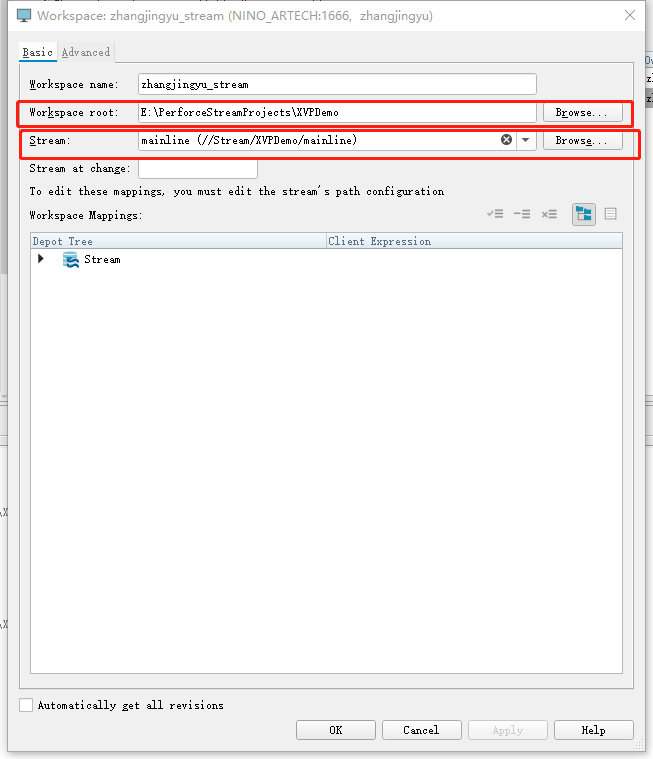
- Change
Workspace rootto the target project directory. - Change
Streamto the Stream for the target project (it does not have to be the mainline; matching the local directory is recommended to make subsequent linking easier). - Choose whether to “copy” files: do not copy if they already exist locally; otherwise, choose to copy.
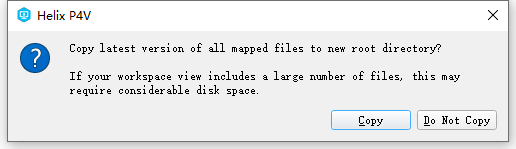
- If you choose not to copy, run the synchronization command (see “Perforce Commands” below).
- Right-click the workspace in the Workspaces view → Edit.
Merging and Updating
- An upward arrow between two Streams indicates “can update” (copy to child/parent), while a downward arrow indicates “can merge”.
- No arrow: that direction is currently unsupported; gray arrow: already in sync; green arrow: updates or differences exist.
Suggested workflow:
- First switch the workspace to the “target Stream”. For example, to update the mainline with changes from a personal Stream, switch to the “mainline” rather than the personal Stream.
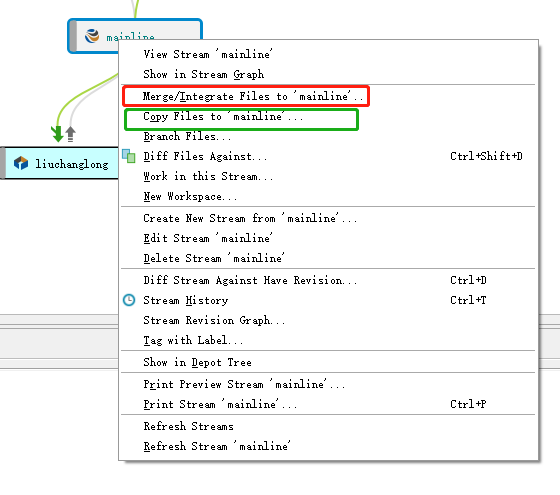
- Right-click the target Stream:
Merge toperforms a merge, andCopy toperforms a copy update. - Select
Source Stream(meaning “from where to here”).
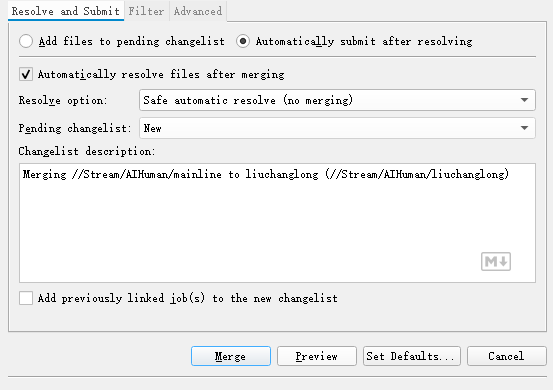
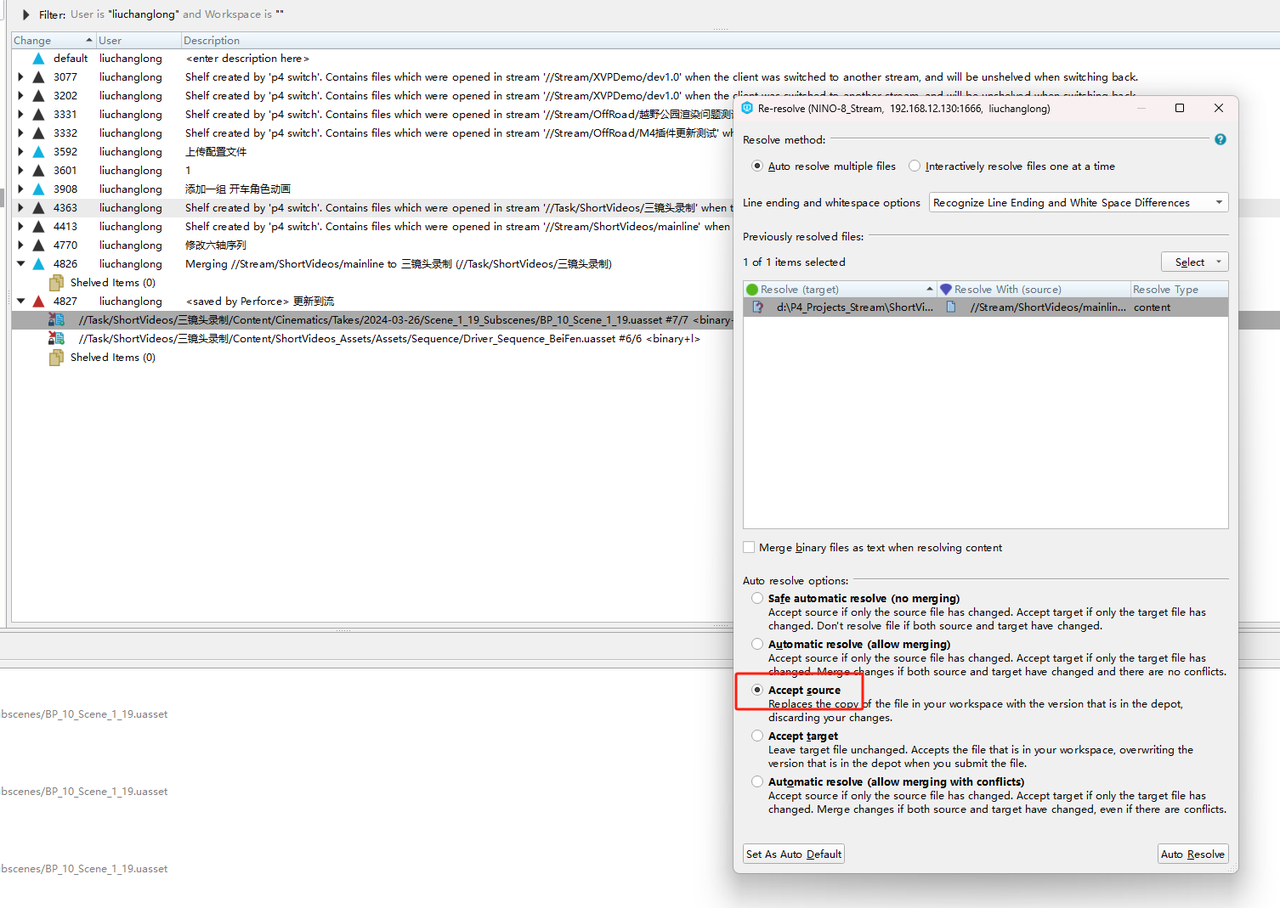
- Check automatic merge and submit; if conflicts occur, handle them manually before submitting.
Linking External Files (Similar to SVN Externals)
Purpose: link files from other depots (usually shared depots) into the current depot for use.
Example: using the Prefixed plugin
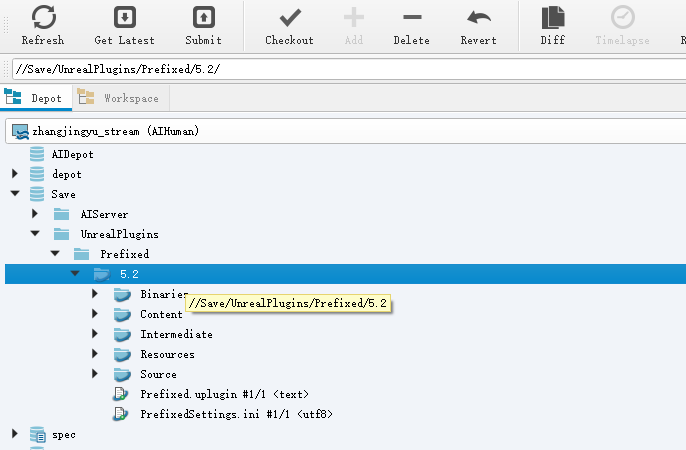
- The plugin’s location in the shared depot:
.../Save/UnrealPlugins/Prefixed/5.2/...
- Right-click the mainline to edit it, and add mappings under “Advanced”.
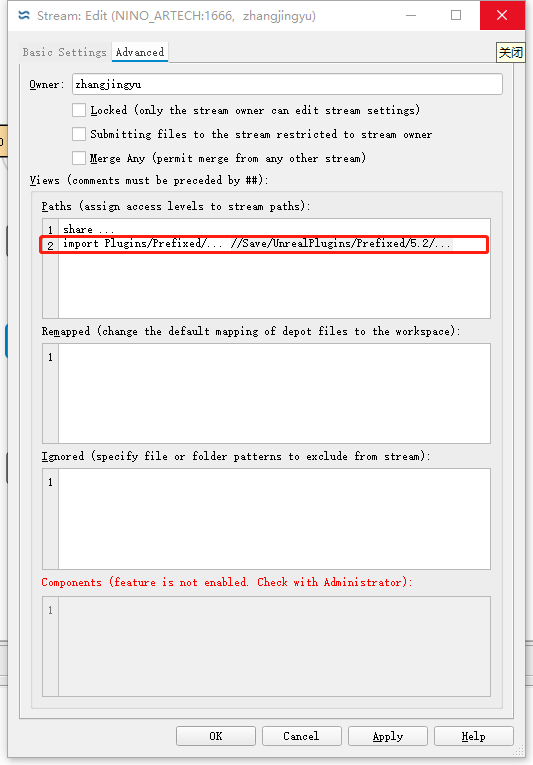
- Click Apply.
Note: branches automatically inherit the mainline’s settings; if the files are only needed in a particular branch, modify that branch alone.
Perforce Commands
Viewing/Using the Command Line in P4V
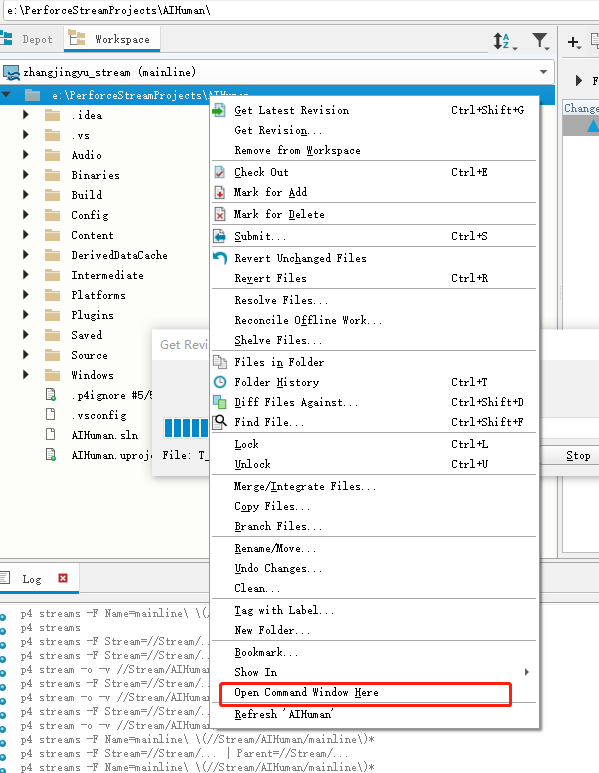
Synchronization Command (Without Downloading Existing Files Again)
p4 sync -k
- Purpose: associate local files with the repository’s records as “synced”, avoiding duplicate downloads.
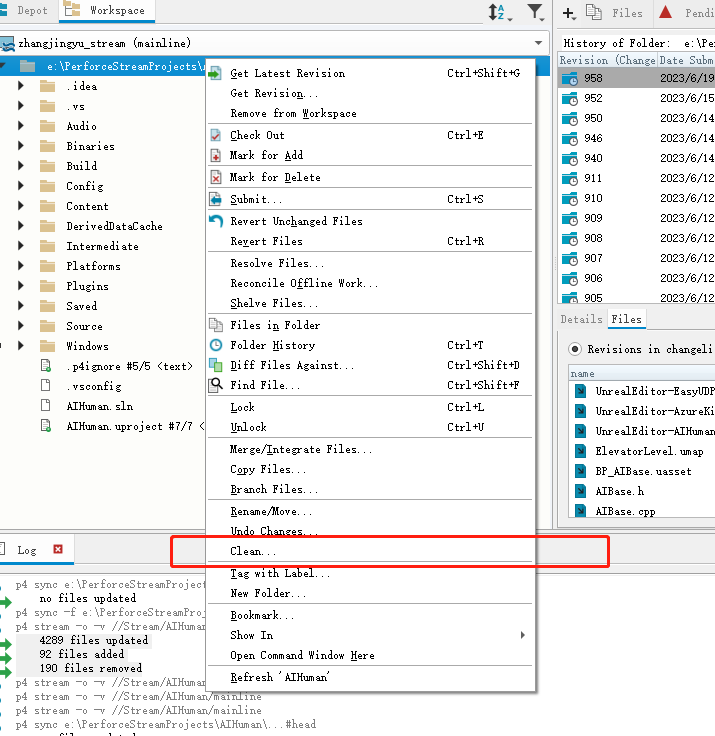
- Recommendation: after it succeeds, run “clean” to verify and clean up.
Thanks for reading. Feel free to like, follow, and bookmark, and discuss any questions in the comments.
If this article helped you, click here to donate and support the author.
