SimpleInputSimulator User Guide
Complete product user guide for SimpleInputSimulator
Supported Unreal Engine Versions: 5.2–5.8
Simple Input Simulator is a lightweight input simulation plugin for Unreal Engine. It provides three Blueprint functions to simulate keyboard, mouse, and gamepad inputs programmatically.
🔧 Plugin Usage
Section titled “🔧 Plugin Usage”The plugin works immediately after enabling. All functions are available in the Simple Input Simulator category in Blueprint.
🧠 Blueprint Node Interface
Section titled “🧠 Blueprint Node Interface”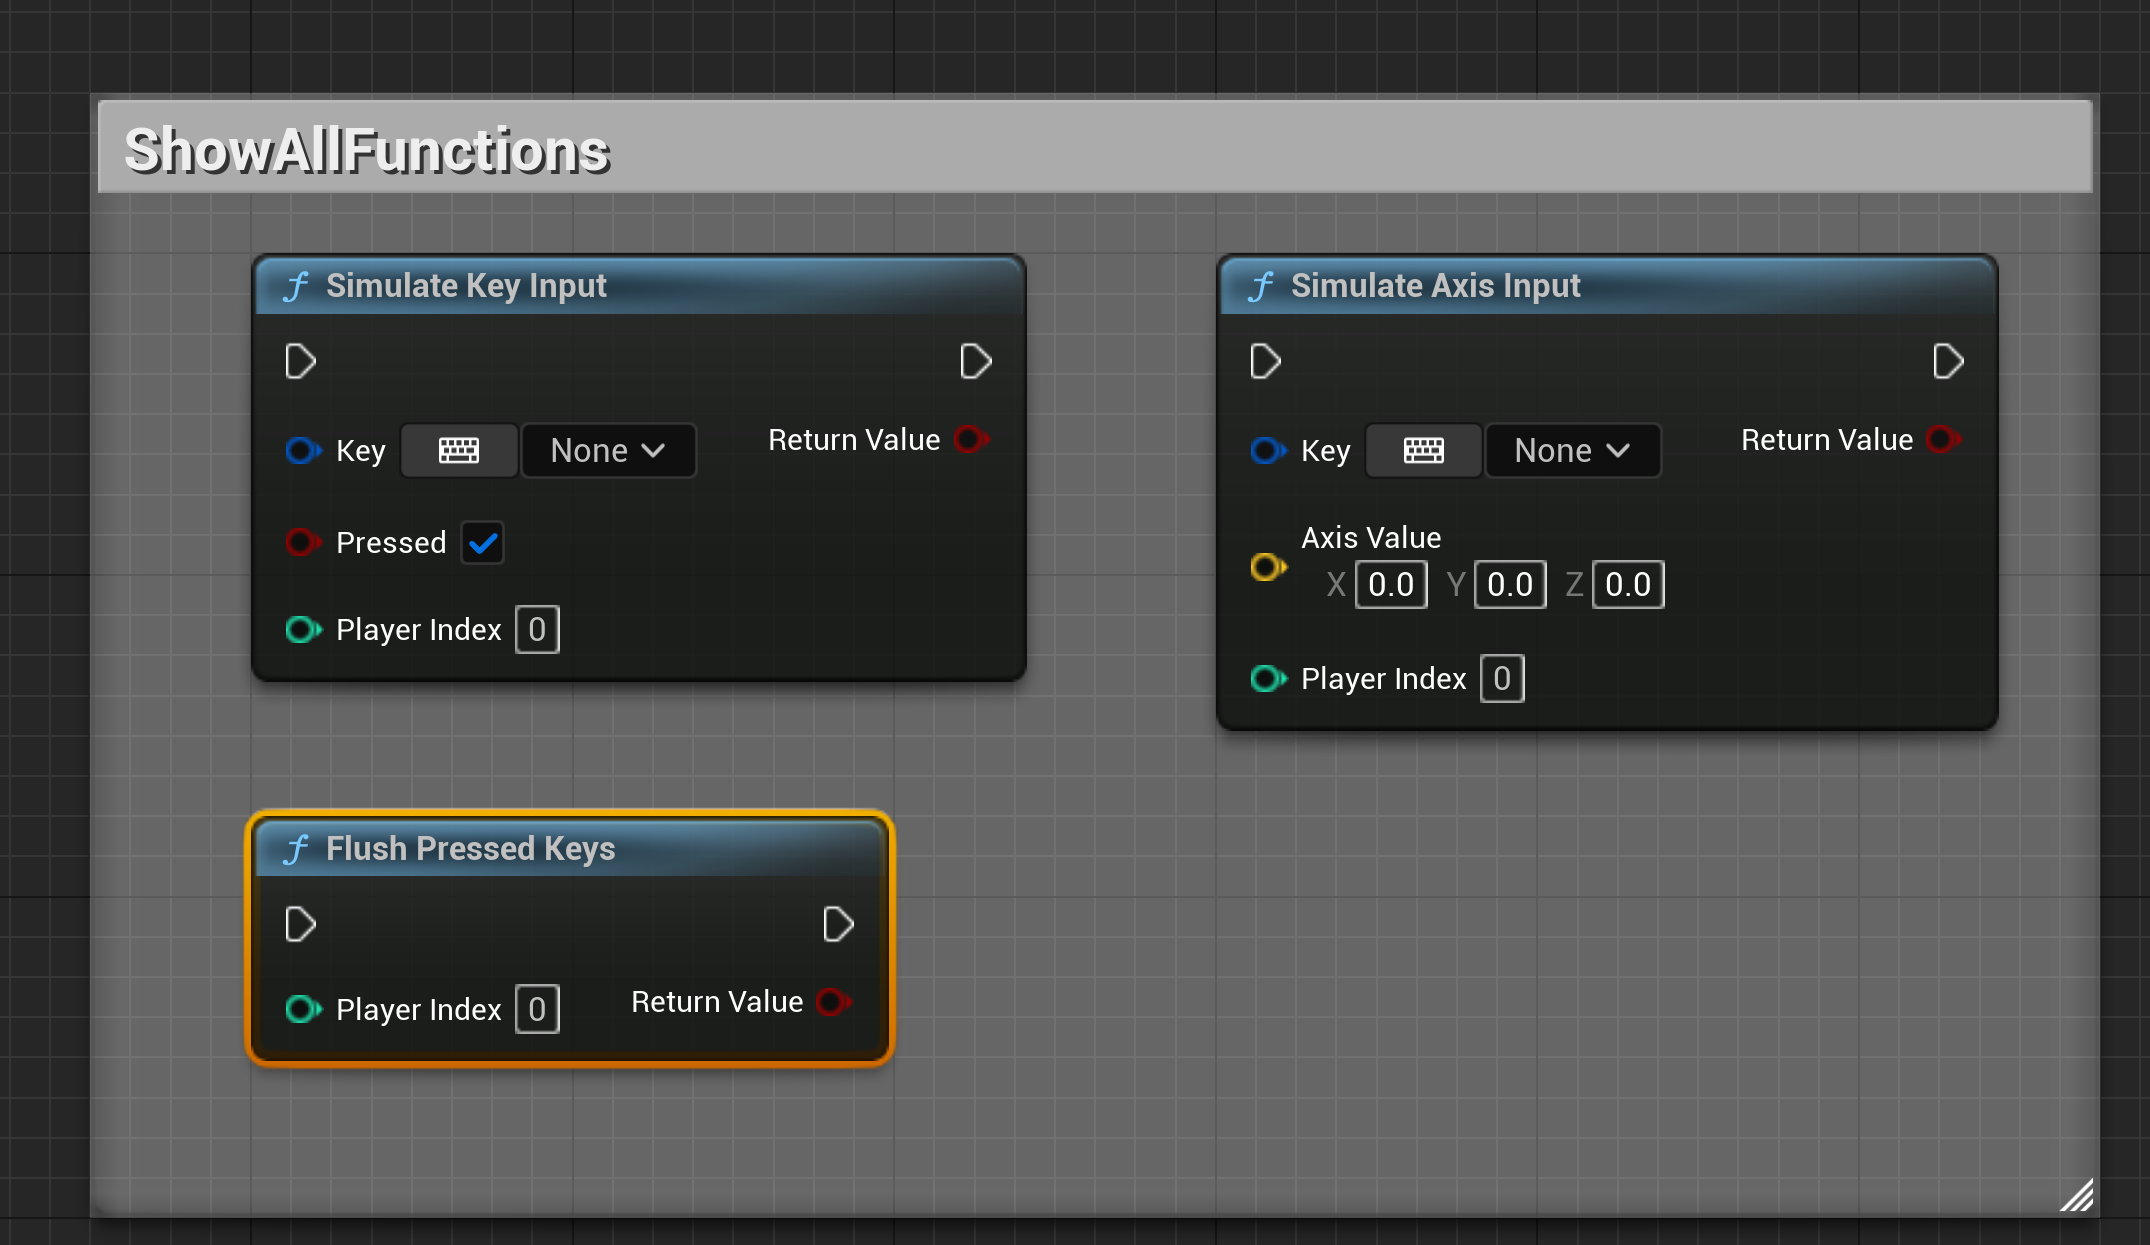
🎮 Key Input Simulation
Section titled “🎮 Key Input Simulation”| Node | Description |
|---|---|
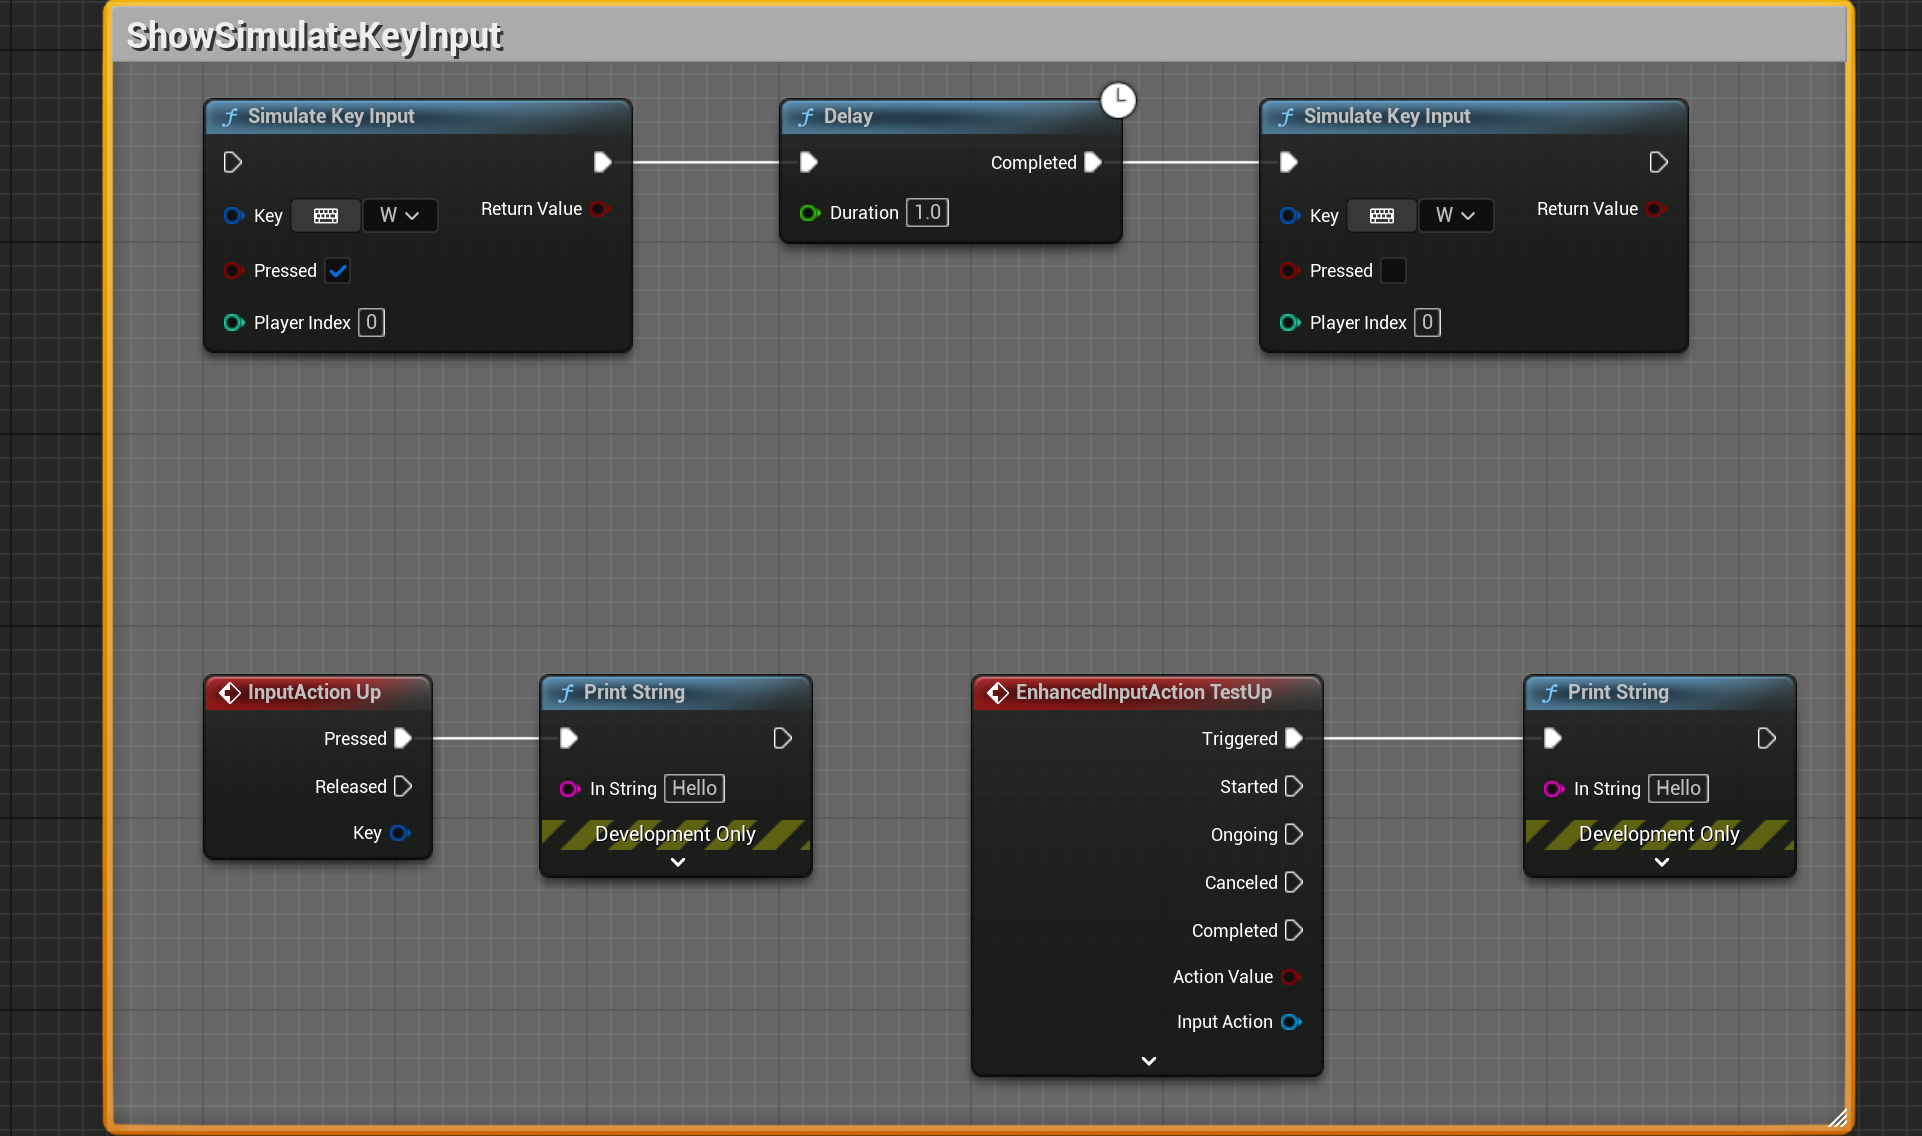
Simulate Key Input | Simulate press/release events for any input key |
Parameters:
- Key: UE FKey input key to simulate (Space Bar, Left Mouse Button, Gamepad buttons, etc.)
- Pressed:
truefor press,falsefor release - Player Index: Target player controller (0 = first player)
🕹️ Axis Input Simulation
Section titled “🕹️ Axis Input Simulation”| Node | Description |
|---|---|
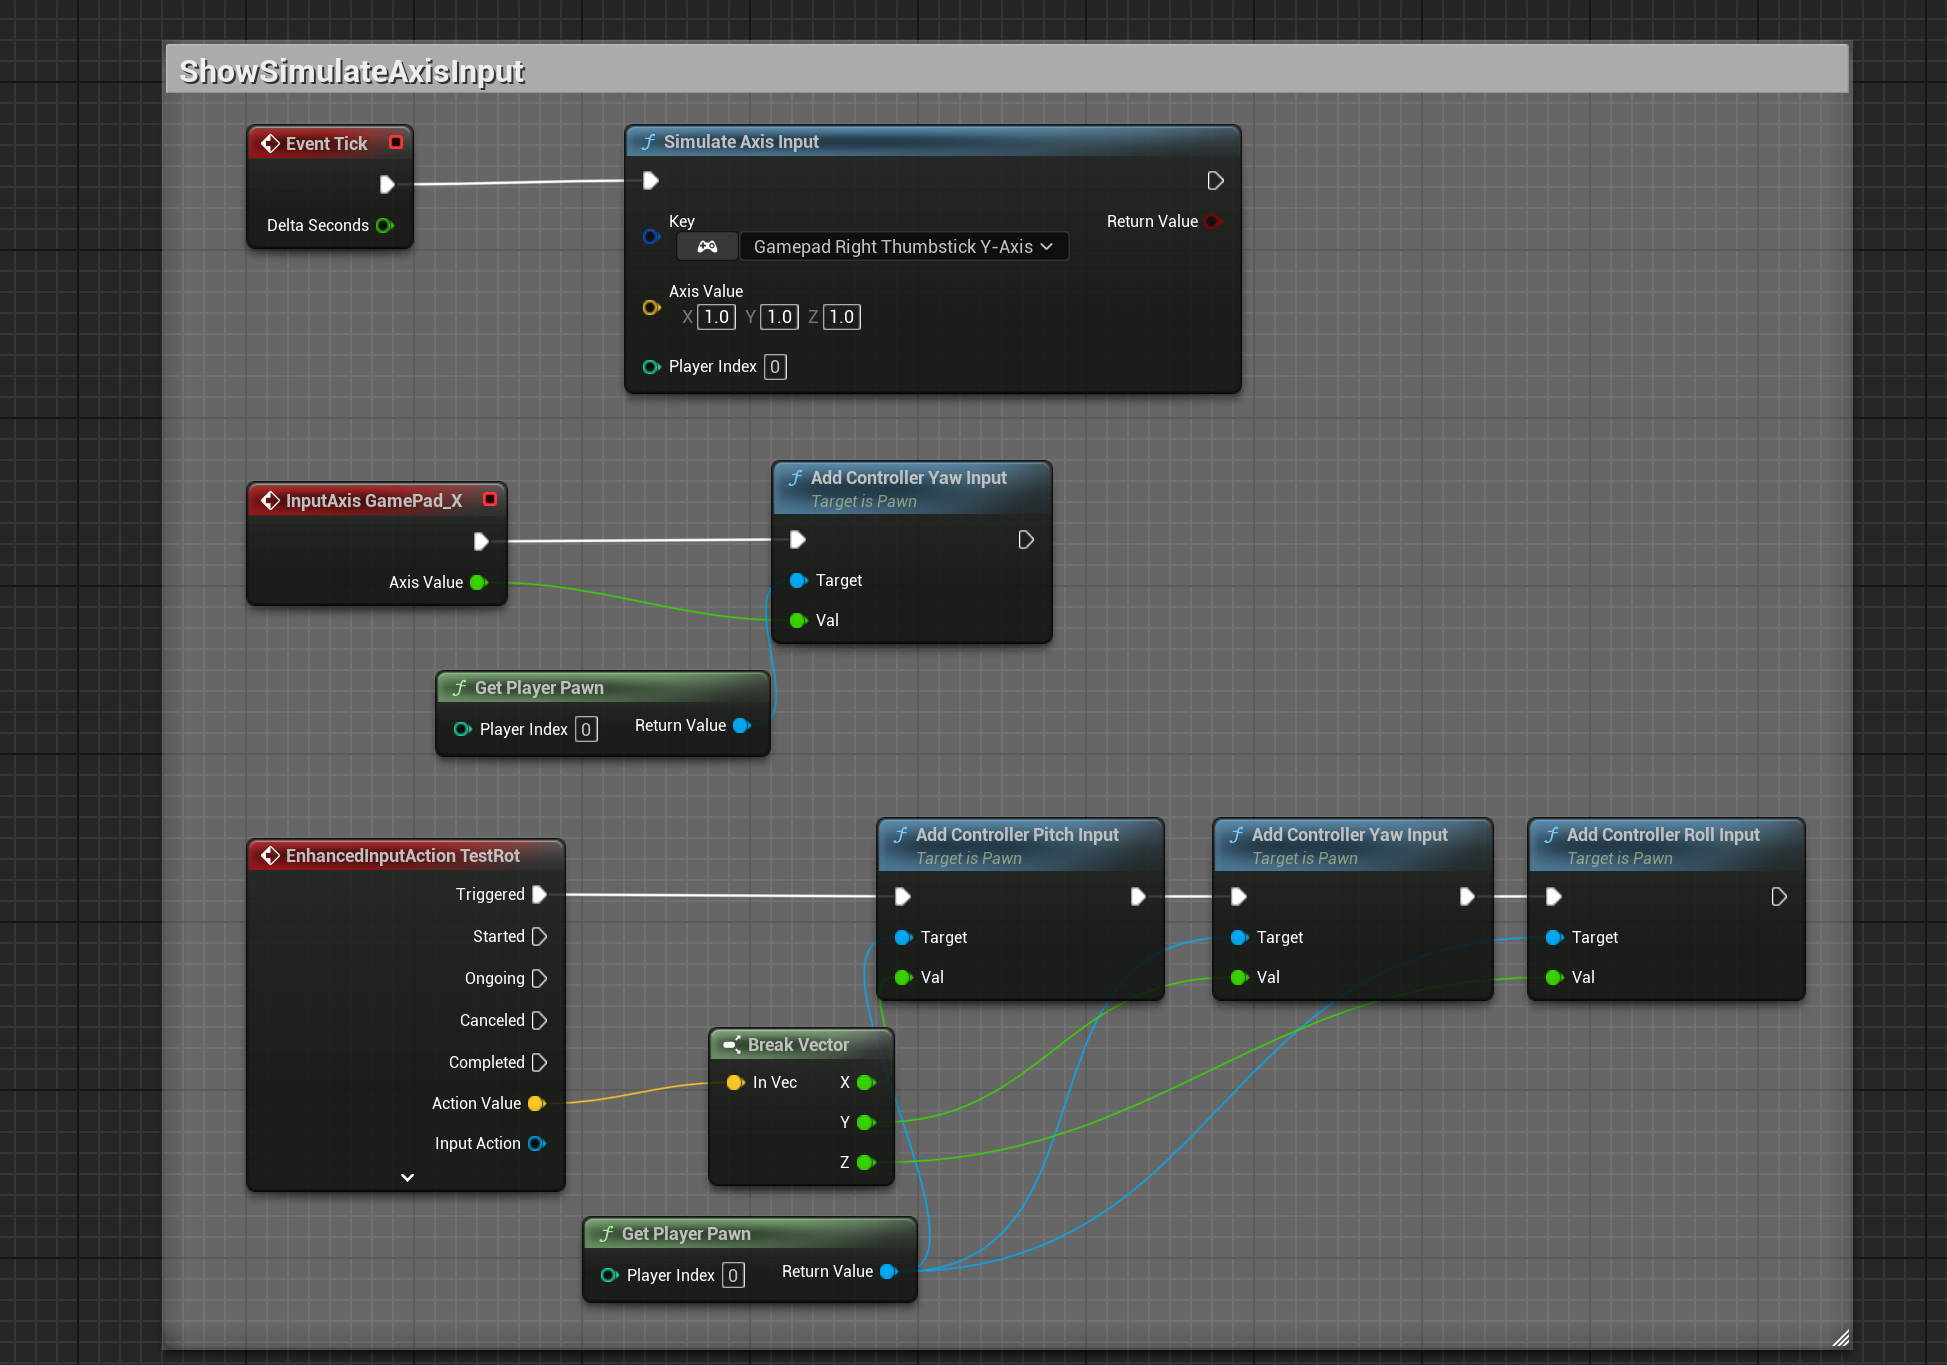
Simulate Axis Input | Simulate analog input values (movement, mouse delta, gamepad sticks) |
Parameters:
- Key: Axis input key (Mouse X/Y, Gamepad Left Thumbstick X/Y, etc.)
- Axis Value: 3D vector for input values (typically use X component)
- Player Index: Target player controller (0 = first player)
🧹 Input State Management
Section titled “🧹 Input State Management”| Node | Description |
|---|---|
Flush Pressed Keys | Clear all pressed keys and reset input state |
Parameters:
- Player Index: Target player controller (0 = first player)
🔁 Enhanced Input Compatibility
Section titled “🔁 Enhanced Input Compatibility”| Input System | Compatibility |
|---|---|
| Legacy Input | ✅ Full support |
| Enhanced Input | ✅ Full support - triggers Input Actions automatically |
The plugin works at the raw input level, so both input systems receive simulated events automatically.
🧪 Blueprint Examples (Images)
Section titled “🧪 Blueprint Examples (Images)”Key Input Example
Section titled “Key Input Example”
Simulate pressing Space Bar for Player 0.
Axis Input Example
Section titled “Axis Input Example”
Simulate mouse movement or gamepad stick input.
✅ Tips & Notes
Section titled “✅ Tips & Notes”- All functions return
boolindicating success/failure - Player Index 0 targets the first player controller
- Pair press events with releases. After a test, demonstration, or replay, use Flush Pressed Keys to clear remaining state and prevent stuck keys
- Nodes can also be called in the editor, but require a valid PlayerController; without one, input cannot be injected as intended
- Axis inputs automatically adapt to current frame rate
- Check Output Log for detailed simulation messages (LogSimpleInputSimulator)
Version History
Section titled “Version History”Open Edit → Project Settings, select the SimpleInputSimulator settings page, and set Language to English or Chinese. English is the default. Available user-facing UI, tooltips, notifications, and functional logs update immediately without restarting the editor. Public API names and module startup/shutdown logs remain in English.
Support
Section titled “Support”For usage questions or collaboration, please visit the contact page.
- Contact: Contact and collaboration
Supplementary Usage Instructions
Section titled “Supplementary Usage Instructions”SimpleInputSimulator User Guide
Section titled “SimpleInputSimulator User Guide”Use Blueprint nodes to simulate keys and axis input, then clear the state when finished.
Features and Nodes
Section titled “Features and Nodes”Input Nodes
Section titled “Input Nodes”| Node | Function |
|---|---|
| Simulate Key Input | Simulate pressing/releasing any key (keyboard, mouse, gamepad buttons) |
| Simulate Axis Input | Simulate axis input such as joystick movement or mouse motion |
| Flush Pressed Keys | Clear all pressed states with one call |
Parameters and usage notes:
- Supports all FKey values, covering keyboard, mouse, and gamepad
- Compatible with both Legacy Input and Enhanced Input
- Supports
PlayerIndexto specify a local player - All nodes are marked
CallInEditor = true, allowing direct testing in the editor - Axis input automatically obtains DeltaTime, so you do not need to pass it manually
Input is injected into the UE input system through PlayerController::InputKey.
Usage Examples
Section titled “Usage Examples”Scenario 1: Automated Game Testing
Section titled “Scenario 1: Automated Game Testing”Instead of sitting at the computer and repeating clicks, write a script to run the sequence automatically:
BeginPlay: Delay(1.0) // 等待初始化 SimulateKeyInput(W, true) // 前进 Delay(2.0) SimulateKeyInput(W, false) // 停止 SimulateKeyInput(SpaceBar, true) // 跳跃 SimulateKeyInput(SpaceBar, false) SimulateKeyInput(LeftMouseButton, true) // 攻击 SimulateKeyInput(LeftMouseButton, false) FlushPressedKeys() // 清理状态These action sequences can be used for smoke testing and regression testing.
Scenario 2: Automatic Demonstrations in a Beginner Tutorial
Section titled “Scenario 2: Automatic Demonstrations in a Beginner Tutorial”Let the character perform actions automatically in the tutorial interface while the player watches:
1. Show the on-screen prompt "Press W to move forward"2. SimulateKeyInput(W, true) → The character starts walking automatically3. Wait 2 seconds4. SimulateKeyInput(W, false) → Stop5. Show the on-screen prompt "Well done! Next, try jumping"The demonstration uses the in-game character to execute an input sequence.
Scenario 3: AI Behavior Debugging
Section titled “Scenario 3: AI Behavior Debugging”Let AI control a character through the input system to verify the complete path from input to behavior:
// AI 决策:向右移动SimulateAxisInput(Gamepad_LeftX, FVector(1.0, 0, 0))
// AI 决策:开火SimulateKeyInput(Gamepad_RightTrigger, true)
This lets you inspect how simulated input is processed into character behavior.
Scenario 4: Input Recording and Playback
Section titled “Scenario 4: Input Recording and Playback”Combine the plugin with a recording system to capture a player’s input sequence (Key + timestamp), then replay it frame by frame with SimulateKeyInput. Uses include:
- Bug reproduction: QA records actions and programmers replay them to locate the problem
- Performance analysis: Replay identical actions on different hardware to compare frame rates
- Highlight replays
Scenario 5: Automatic Exhibition/Demo Presentations
Section titled “Scenario 5: Automatic Exhibition/Demo Presentations”When nobody is operating the game at an exhibition, let it demonstrate highlights automatically:
// 循环播放预设的操作序列while (bDemoMode): PlayDemoSequence() // 内部用 SimulateKeyInput 驱动 Delay(5.0) // 每段演示间隔 5 秒Scenario 6: Local Multiplayer Testing
Section titled “Scenario 6: Local Multiplayer Testing”Test a two-player game alone by controlling the second player with a script:
// 玩家1:手动操作// 玩家2:脚本控制SimulateKeyInput(W, true, 1) // 玩家2 前进SimulateAxisInput(MouseX, ..., 1) // 玩家2 转向Installation and Calls
Section titled “Installation and Calls”Installation
Section titled “Installation”Copy the plugin folder into the project’s Plugins directory and restart the editor.
Search for the Simple Input Simulator category in Blueprints and drag out the nodes to use them directly.
- Simulated input requires a valid
PlayerController; ensure the game is running - Release keys after pressing them, otherwise they remain pressed
- Call
FlushPressedKeysafter testing to clear remaining state